Produce Bags: A Simple DIY Tutorial
Have you ever felt like you can’t possibly make much a difference in the world when it comes to environmental issues?
With this DIY produce bag tutorial, you can! Your friends are going to be all over your for them and you can even turn it into a little extra cash if you wanted to.
The Staggering Impact of Single-Use Plastic Bags
Having your own produce bags is a must in my books. Millions of pounds of plastic are created every year and it never leaves this earth.
- Plastic bags start out as fossil fuels and end up as deadly waste in landfills and the ocean.
- Birds mistake shredded plastic bags for food. Floating plastic shopping bags look just like jellyfish to hungry sea turtles.
- Fish eat thousands of tons of plastic a year, and larger fish and mammals (including us), eat them.
- Americans use 100 billion plastic bags a year, which require 12 million barrels of oil to manufacture. It only takes about 14 plastic bags for the equivalent of the gas required to drive one kilometer.
- Plastic bags are used for an average of 12 minutes.
- It can take anything between 20-1000 years for a plastic bag to break up. As in they break up into smaller pieces. They don’t break down. Those that do, break down into polymers and toxic chemicals.
Despite all of this, plastic bags are in almost every North American home because retail giants continue to use them for nearly every purchase made in their stores.
Produce Bags Are So Easy, It’s Fun!
If we want to continue living on this planet in our own life time, let alone our children’s lifetime, we have to do something.
I’m a firm believer that the little things add up. Any way to reduce my environmental impact by switching my habits, I’ll try and do it!
Here’s a super easy and fun way to reduce your plastic waste. It takes less than 15 minutes and there’s no need to be perfect.
Your produce bags are going to look awesome and get so many compliments.
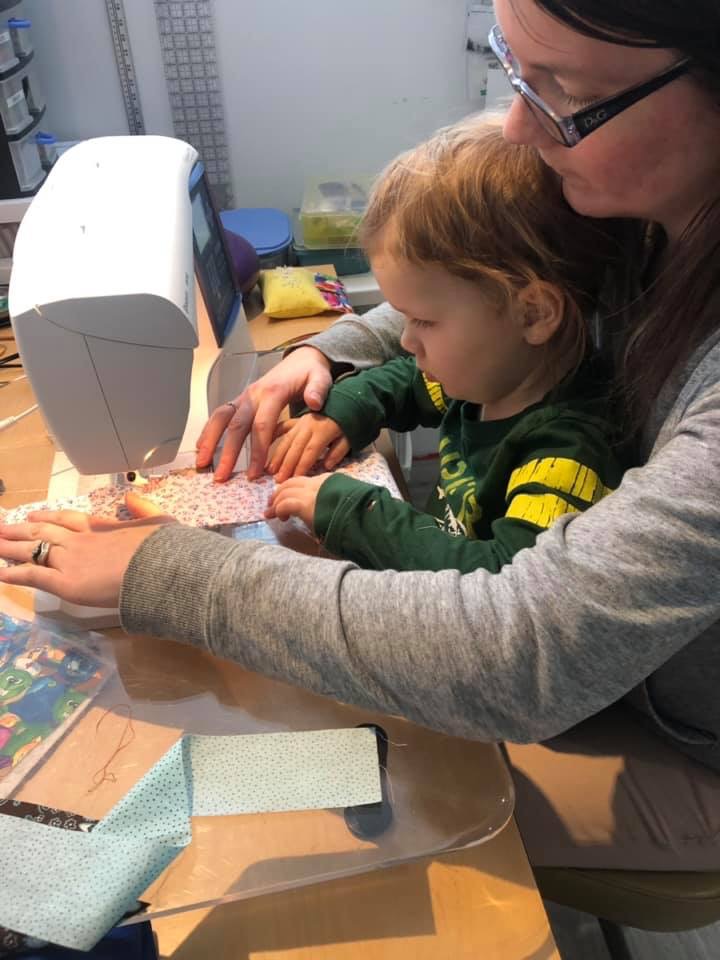
It’s also the perfect way to introduce your kids to sewing. Little Man helped me stitch them up!
*If sewing with kids, have them help feed the sewing machine, or line up the fabric. If they’re a bit older (4/5) they can even help cut or stitch it themselves. Have fun!
Supplies:
- Needle + thread / or sewing machine
- Thimble if you’re hand stitching!
- Ribbon
- Old bedsheets or pillow cases or lightweight scrap fabric
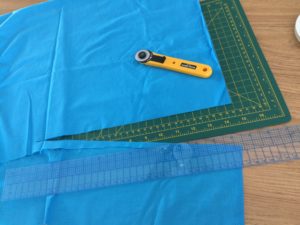
- Ruler
- Cutting board
- Scissors or fabric cutting wheel
Figure out the size of bag you would like. I made two different sizes.
9” x 12”
13” x 14”
Directions
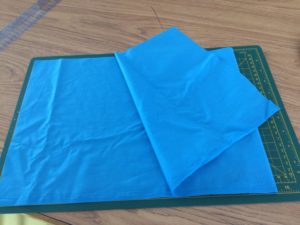
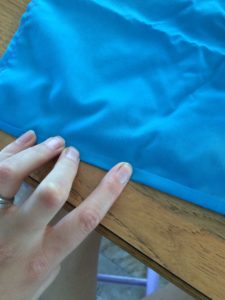
Step 1: Fold your fabric to either the width (9”) or the height (12”) with the finished side IN.
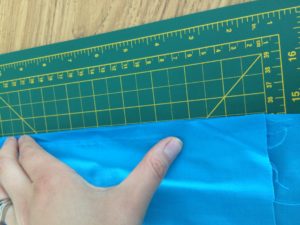
Step 2: Crease the fabric at your fold.
Step 3: Use your scissors or fabric cutter to cut along the length and width.
To Sew Your Produce Bags
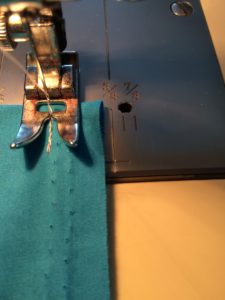
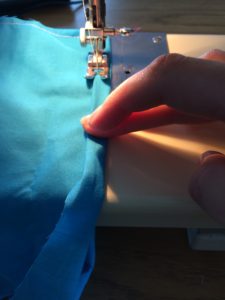
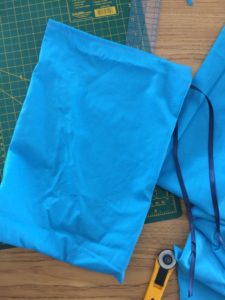
STEP 1: You’ll have three sides of your bag unstitched (the 4th is your folded edge).
STEP 2: Stitch up both sides. This does not need to be perfect! Check out my line. I cut off the excess and my line is soooo not straight!
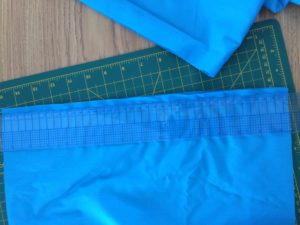
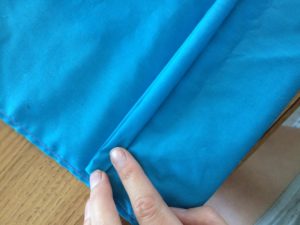
STEP 3: For the top edge, fold it over a small bit and crease it with your fingers.
STEP 4: Repeat Step 3 to get a super finished edge, or omit Step 4. It’s really up to you!
Step 5: Stitch the folded edge in place. You will need to correct the fold as you stitch. Again, this does not need to be perfect!
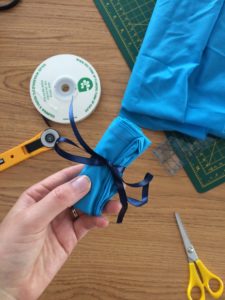
Step 6: Turn your bag inside out and cut a piece of ribbon – enough to tie a bow. PS. Mine is SUPER long. Don’t follow my lead.
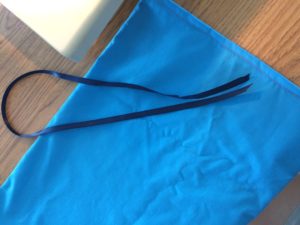
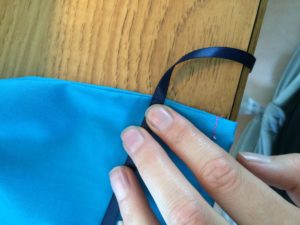
Step 7: Find the centre of the ribbon and place it about 1-2″ down the long edge of your bag, from the top. Stitch it on.
*Now, you could have just as easily added this ribbon while you were stitching up the sides. I forgot that move when I was taking pictures so here it is…
Fold your ribbon in half. Open one long edge of your bag. Place the folded end of the ribbon about 2-3” down from the top of the bag. Leave about 1/4″ hanging out and the ends of the ribbon placed inside your bag. Fold back up the fabric. Sew the seam together.
Now back to our regularly scheduled stitching…
STEP 8: Oh hey! You’re done! Congratulations, you just made a produce bag for yourself!
ALTERNATE: If you would prefer a drawstring close, put your ribbon in this folded edge and stitch away! Be sure NOT to stitch down your ribbon as you want it to be able to move. Alternatively, you can thread your ribbon through using a safety-pin.
If you use it for dry-bin goods, you can either wrap a tie with the code around it, or I like to write the code on my shopping list or in my phone to just tell the cashier. So much easier!
Congratulations! You’ve made a big impact on the environment! One less thing you have to worry about at the grocery store.
Some other uses for your new pattern:
- Gift bags
- Gym bag
- Clothes + accessories bag
- Shoe bag
- Book bag
Friends will love your produce bags! They’ll think they’re the coolest thing and want them for Christmas. Go ahead and spoil them your new gift bag turned produce bag, turned shopping bag. You rock!
What would you like to learn how to make next?

How to Start Your Homestead

You May Also Like
How to Start Your Homestead

12 Homestead Skills to Learn This Winter