How to Make a Food Forest to Feed Your Family For Generations
“And into the forest I go, to lose my mind and find my soul.” – unknown
Having an abundant food forest on your own property can be a win for sustainability and permaculture gardening, and fill your cellar with delicious and nutritious foods, all year long.
Regenerating the land is a pillar ideal of homesteading. Replenishing nature where it’s been lost and captivating the beneficial systems and permaculture.
Our acreage is in the middle of farmland.
We have a manufactured treeline on one side of us, and a small strip of what remains of a former forest.
The goal is to create more privacy and more varied terrain by adding more trees.
The thought was to turn our acre garden into a permaculture food forest but since we need privacy and wind shelter first, why not start there and use fruit and sap trees to gain extra harvest?
[convertkit form=1856289]
What is a food forest?
A food forest and replicating nature by having large fruit trees, then bush nuts and berries, and pairing them with your traditional vegetable plants.
Have a look at the way a forest lays itself out the next time you go for a walk. You’ll find bushes below trees and edible plants and ground coverings below those.
The bushes and trees act as a natural support for plants that like to climb, such as butternut squash, while also creating beneficial nutrients, pest deterrents, pollinators and shelter.
Overall it uses the permaculture of a natural forest, replicated with edible plants.
Where to Source Your Plants
Originally the idea was to purchase 2-3 trees a year to grow our forest and add some diversity. Next plan was ditch diving or ask friends to scrounge their yard.
Last year, we decided to let one area of our yard grow wild, and within a few weeks we noticed tree saplings popping up! Low and behold we have about 8 different kinds of saplings growing. Turns out there already is diversity here, we just need to transplant those saplings to spread it out.
While visiting friends earlier this summer, they just happened to be removing saplings around play area. And they were maple trees! Score!
Also, upon closer inspection of the trees on our property, we have Boxelder maples right outside our front door – with saplings!
Boxelder, otherwise known as Manitoba Maple, is what most Canadian maple syrup growers use. It provides/_%$#=/ of sap which %##%% of syrup. The tree that produces the most sap is a Silver maple, which we had gotten from our friends.
Putting the call out that you’re looking for trees and bushes can end up with a 2-3 hour car ride to fill your trunk with whatever bushes, saplings and vines you can collect.
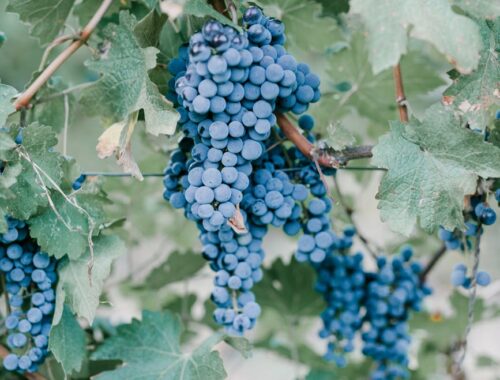
My sister called and they had a family property being sold with a mature yard full of plums, cherries, apple, pear, grapes, raspberries, roses and more. Anything I wanted I could have. Put the word out and you’ll get whst you need faster than you can plant it!
Keep the roots moist in transport and until you can plant them. I’ve found it better to put the bare root into water rather than potting it if you can’t plant right away. I still have some I haven’t planted from a month ago and they’re sitting in a watering can growing new leaves.
How to Plant Your Trees and Bushes
There are two methods you can do. One that is the recommended ways and the other that is completely unconventional but its fast, cuts down on maintenance, and actually has better results.
I’m going to go over both of the ways I used.
First, the recommended way: Dig a hole twice the size of the bucket… well that doesn’t work since I harvested them. So I dug a hole to match the root depth of the sapling, backfilled with soil taken out, watered the soil in there, added soil mix, soaked in, added my tree and topped with soil taken from the hole.
You don’t want to add too much new soil as you want to force the roots to grow outwards rather than staying cozy in the new soil. It’s just to give them a nice dose of nutrients to get them started and not to into shock.
Watering is key (always, right?). Do a deep water when you plant them and then water them every day for a week and then weekly after that. Do a deep watering on hot days. Try and water in the evenings so that the plants can absorb the moisture and grow in the cooler night.
Plant only as much at a time that you can maintain watering.
For raspberries, they can be quite difficult to transplant as they dry out very easily. The best way is to dig a hole, plop the bush in, water and that’s it. No added soil, no fuss, just in and watch the watering. Super quick and easy.
This is the method I recommend doing. I did half my bushes with added soil and half dug plopped and closed back up, no watering maintenance. The ones that were the dig and plop method are the ones that actually survived transplanting!
I recently tried this method with 23 other trees and it’s so far worked beautifully. More time for other projects!
Be sure to add flags to mark your saplings and cover them come fall to protect them from bunnies and deer in winter.
What Trees To Plant
- Maple
- Apple
- Pear
- Plum
- Acorn
- Birch
- Elder
What Bushes to Plant
- Raspberry
- Currants
- Haskap
- Chokeberry
- Rosehip
- Saskatoon
What Ground Coverings to Plant
- Any kind of fruit or vegetable that is vined or grows lower to the ground like strawberries
- Root vegetables
- Herbs
- Flowers and grasses
- Grains
Lessons Learned From Our Food Forest
Explore your yard to see what you already have. Let some areas grow wild if you can (you can mow it back later). You’ll begin to see saplings where you never noticed them before.
Next up, ask your friends! Bushes that send out runners are usually fast freebies you can find, like raspberries.
Don’t be too quick to think a tree has died. Love it with water and although its leaves may fall off, it may be doing work to secure its roots so don’t give up until the next summer.
Trees reproduce and grow in tough conditions. Runner bushes like raspberries are hardy. Don’t baby them. Dig and dump.
Remember, the best time to plant a tree was 20 years ago. The second best time is now.

You May Also Like
Produce Bags: A Simple DIY Tutorial
How to Make an Herb Drying Rack (that won’t break the bank!)