How to Set Up A Garden Irrigation System: and make your life a whole lot easier!

When it comes to watering your garden, unless you have a teenie tiny amount of plants, or a whole lot of time on your hands, a proper garden irrigation system might be the thing you need to make it through the growing season with your plants intact!
I don’t know about you but I start the year off with great intentions and watering every day and then… it gets hot. And it takes 2+hrs a day. And things still die… so I get that “survival of the fittest!” feeling towards my plants.
Before I know it, they’ve gone too far and no amount of water dumped on them will bring them back. 😩
In times of severe shifting weather patterns and scorching hot summers, having your garden thoroughly watered, without wasting water, takes a bit of the stress of a successful crop away.
Now, maybe you’re also like me and thought an irrigation system sounded fancy, complicated and expensive.
Well it is luxurious to have more time with better yields and less waste. It can certainly look complicated and boy can it get expensive.
Or not.
Today I’m going to show you how to set up a simple irrigation system that will have you throwing your money at it and plotting out how to put all of your watering on autopilot – for less than $200.
Now, if that seems like a lot, hear me out.
Your irrigation system is going to become your best friend. Your lover, even. If you buy the cheapest option (guilty!), you will have leakage issues and the time and frustration to get it right isn’t worth the money saved.
What I am going to show you is where you can save some money, and get the best bang for your buck in setting up your garden growthification system.
What is an Irrigation System?
From the Latin word, irrigationem meaning “a watering”. A noun of action from past participle stem of irrigare “lead water to, irrigate, flood”
Irrigation is the artificial watering of land to encourage plant growth. We can do this via a variety of irrigation systems.
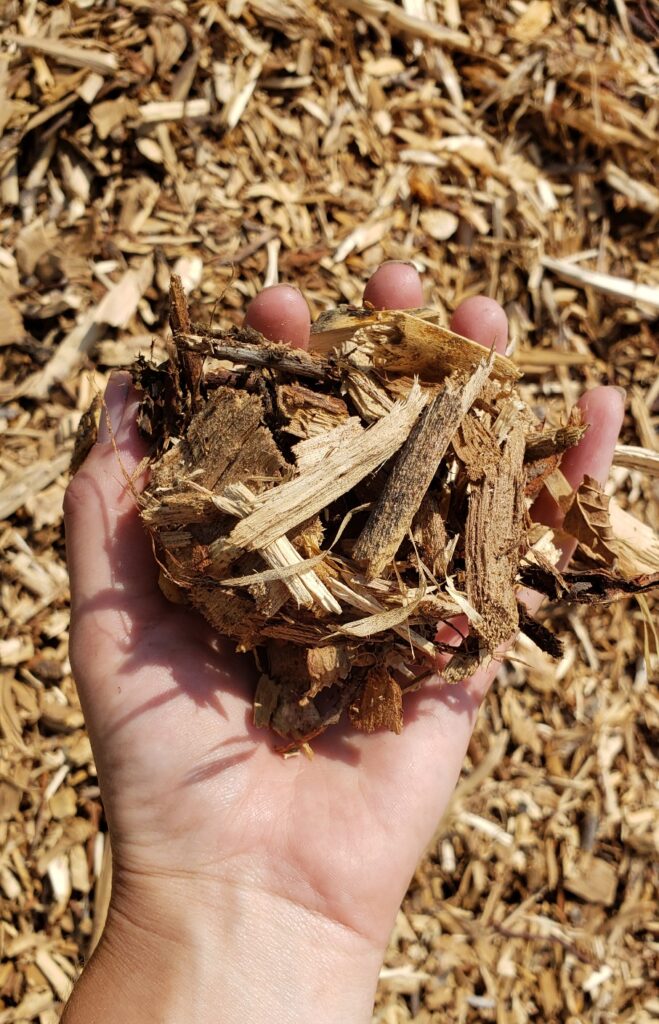
While the first step is to get water to the land, another very important step is to keep and maximize the water in the land. The best way to do that: mulch.
Why Should You Use an Irrigation System?
When it comes to a proper irrigation system, you will have little to no wasted water. Used in conjunction with proper mulch and companion planting, irrigation can minimize your water waste and maximize your harvest, with a fraction of the water you used to use.
Irrigation systems can be done on a small scale and are easily suited for a home vegetable garden.
In fact, they’re kind of perfect for it! Hey, anything that can maximize my time spent in the garden, while also minimizing it (let’s be real, I love my garden but the laundry does need to get washed) is a project worth doing!
Types of Irrigation Systems
There are a few main types of garden irrigation systems.
- Watering can: a good replica of a gentle rain but not very practical unless your garden is less than 20ft². Create a saucer-like well around the base of each plant to help the water drain into the root area. A thorough watering will mean several trips to each plant.
- Hose: adjust the nozzle to a find spray and prop the hose up with a stone or forked stick. Move the hose after 15-20 minutes to allow for a deep soak.
- Sprinkler: the most common one is a sprinkler set up. This is a great way to lose a lot of water to evaporation, and to take up a lot of your time. It’s a great beginner step but at some point, unless you have that small garden or loads of time, you’re going to need to graduate up the irrigation system ladder.
- Drip line/soaker hose: allowing a slow drip of water to steadily water plants along side where the hose or dripline is laid.
- In-ground water lines: basically taking your perforated hoses and digging them into the soil below the plants roots. The water is directly watering the roots, and there’s no evaporation.
- Furrowed rows: creating deep irrigation ditches between each row and filling them with water. You can damn off sections to irrigate separately or use a central ditch to feed other smaller ditches. At the end of hose tie an old sock or some burlap to dampen the force of the water so it doesn’t erode your trenches.
For this article, we’re going to walk through setting up a drip line. Its your middle of the road option which has more flexibility than a soaker hose, and costs less overall.
What is a Drip Irrigation System?
A drip system is simply a pipe laid along the top of your mulch or soil that has holes every foot or so. These holes allow water to drip out and slowly saturate the earth around it.
Using a drip irrigation system is perfect for an avid gardener with a larger sized garden, or someone growing enough food to feed their family for a year.
Why Use a Drip Line Garden Irrigation System?
When it comes to irrigation systems, a drip line is a step above your handheld methods (which will feel like ansolute luxury), and can be amped up with a timer so you can set it and just about forget it completely!
Drip line irrigation systems are also the bees knees because they are:
- Flexible
- Not buried so it is easily accessible
- Can move it, change it (customizeable)
- Move indoors during winter or blow out the lines with an air compressor
- Easy to check for damage and simple to replace parts
- Inexpensive
- Can put it together yourself
For a 4×8 raised garden, you’re looking at about $15 a bed to lay a simple irrigation line. Have an in ground garden? It’ll be even cheaper than that because you only have to run one line.
For something so cost effective and easy to put together, it’s a wonder we don’t all do it from the start!
What To Consider for Supplies
Some of these supplies can be found at the hardware store but for the main products, you’ll source them at a local supplier of irrigation goods for lawn care, landscape, and irrigation companies.
Ask around! See where local companies get their supplies. They might even be able to get you a deal!
There are many ways to run a drip line. What you need to decide first is are you going to run a hose from your tap to your garden, or run a 3/4″ sold pipe from your tap to your garden?
You’ll have to account for getting the correct attachment pieces to connect your irrigation system to either one but it’s fairly simple to figure out your needs, or ask someone at the store.
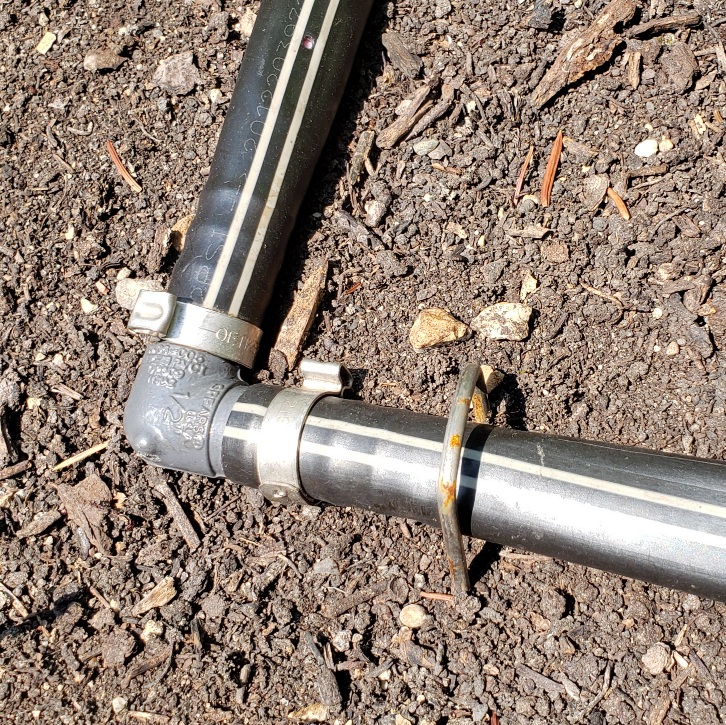
There are two types of pieces you can use – one that is a simple twist and go, the other involves clamps and a little more labour. The cost difference is pennies. It’s more of a preference.
Tools
PVC pipe cutter: this is a great tool to have and relatively inexpensive. You’ll finfiit very useful to cut and change lines as your garden layout and needs change.
Clamper: to tighten the clasps
Scissors: to cut your drip tape
Line Supplies
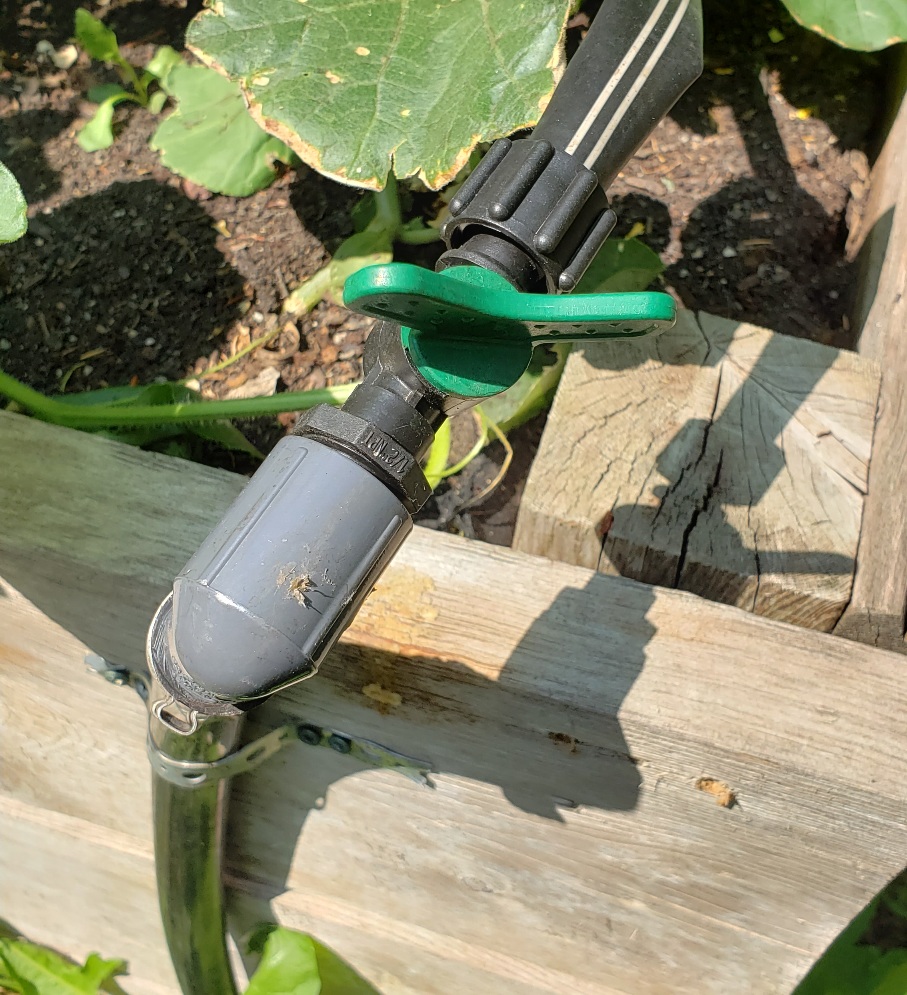
Valves: these connect to your main watering line. You may find that you don’t need the valves if you have a smaller garden, or enough water pressure that you can run your whole irrigation system on one circuit or “zone”. (Unless you have a MASSIVE garden, you most likely can do this.) They are handy if you have plants that need more frequent watering than others. You can get a screw in valve which would connect to the end of a hose, or one that requires a small puncture to connect into a 3/4″ pipe.
Landscape stakes: or some kind of stake to hold your drip line in place.
½” drip line: your rows will be <12″ apart so map out how much you will need and get more than that. Extra is not bad!
Clasps: ½” to connect your drip line pieces and ¾” to connect to your main watering line (if its not a hose)
½” corner pieces: you can get this version or this.
¾” solid piping: this is for your main water line from your faucet to your garden and attaching all of your beds to.
½” solid piping
Connection Supplies
Timer: *optional but very useful. You will never miss a watering and your tomatoes will produce nicely with the consistency. Will run about $50 on average.
Faucet: adding one to the end of your main line gives you options for hand watering, filling buckets, adding a sprinkler, setting up a wash station, etc.
Y splitter with shut off valves: having this at your house tap will allow you to run your drip line, and have another hose line available for whatever else you may need. You can also get a splitter with up to 5 lines. Just ensure there are shutoff valves.
Plan Your Drip Line Irrigation Setup
Your main line will run from your outdoor faucet. I recommend adding a Y-splitter or 4 hose faucet with shutoff valves. This way your irrigation system is not monopolizing your tap, and you have easy access to control which line the water runs down.
Connect your PVC pipe or hose to your faucet.
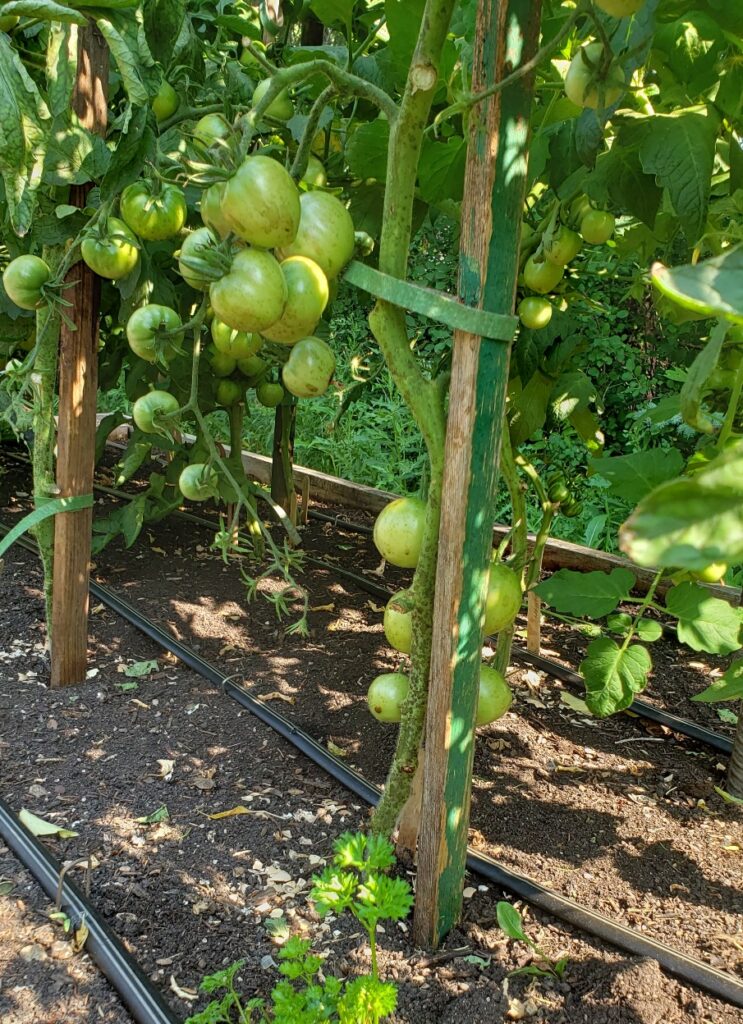
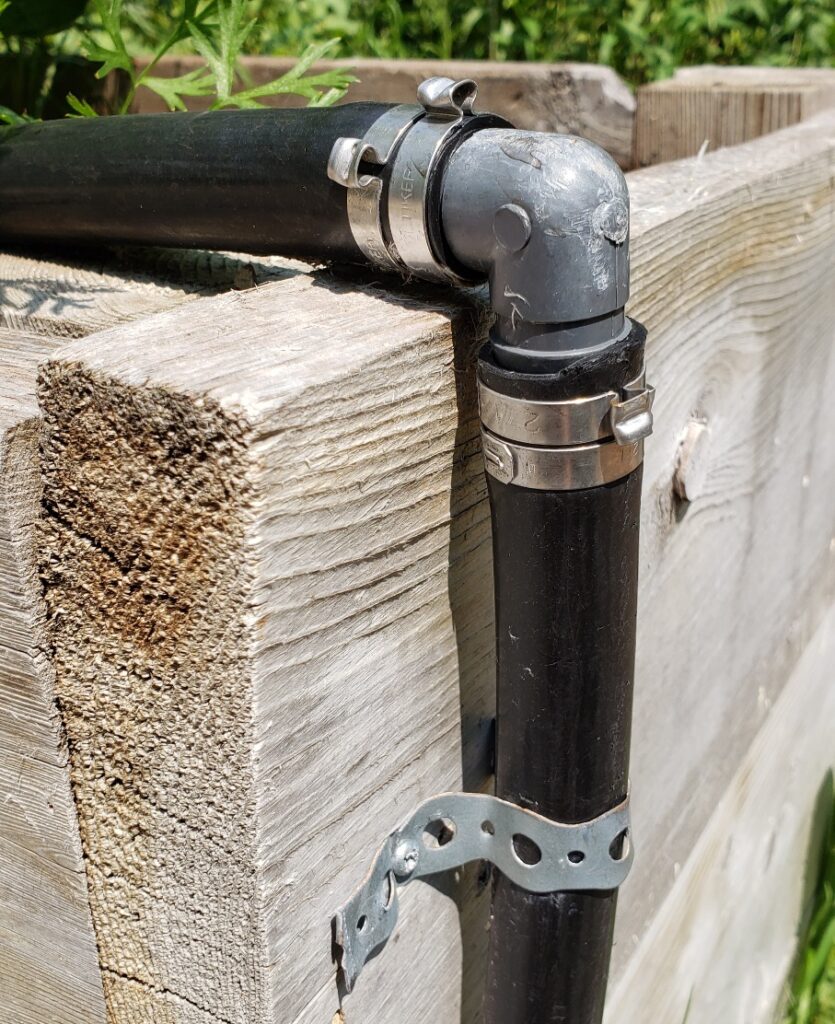
Bring your water line over to your garden. If you have raised beds you’ll have to bring the lines up like in the image below.
If you have in ground beds, simply connect your drip line to your main line.
Map out the layout you want in your garden. From there, start laying your drip line down. Once it’s assembled, turn it on to test it out and fix any areas where their may be joints not tightening fully, or where you’d like the rows to be closer together.
Keep in mind that you can adjust, redo, move, and make changes on a whim. Drip irrigation is designed to be flexible. That’s a big part of the beauty of it! Don’t be afraid to cut it, plug it, and change it up. You want it to work for you.
If you can, investing in a timer takes the additional memory and time commitments away so your garden is truly watered on autopilot. A timer is going to run your about $50. It is WORTH IT!
The downside is that automating the water has you in the garden infrequently. Your plants do still need you to check on their watering and for weeding. And to talk with them!
Your jungle will grow quickly with better watering so keep that supervision up or you’ll be trimming tomato branches you wish you’d trimming up earlier!
Using Your Drip Irrigation System
You will fine tune your system as you get the hang of using it and learn what your plants and soil need throughout the growing season. Your environment is different than my environment. I’ve included the times that work for me. You may find you need more or less.
If you have installed your drip line prior to planting, turn it on and allow the water to make a mark. Then plant your seeds or seedlings where the water goes.
If you have already planted, don’t fret! Having an irrigation system will be better than not. Your plants will still get water, even if they aren’t right next to the water hole in the drip line.
Frequency
This is how often you use your irrigation system in a 24hr period. In the spring, when you first plant, you will generally need to water twice a day. This allows your seeds to germinate and your young seedlings to stay moist. As your seedlings grow you can reduce to once a day.
Duration
The length of time your system is on determines how much water is applied. Longer duration, more water. When temperatures are cool and the evaporation of water is lower (ie. Spring), you can have a shorter duration (5 mins). When the summer heats up, increase the duration (20-30 mins) so the water reaches lower and the roots are drawn to it in the heat of the day.
As late summer and early fall approaches (when cool season crops start) and humidity is low, reduce your duration and increase to 2x a day.
If you have sandy soil, try watering twice a day rather than increasing the duration as water flows quickly through sand.
Adjusting Your System
As you learn your new drip system you will have adjustments to make. Irrigation of any kind will always be in flux, just with the nature of, well, nature! The rate of growth, type of plants, temperatures, soil quality.
You’ll have trial and error in the beginning to see how long and how often to run your system.
Start watering at 15 minutes a day. Observe and see if there are any signs of stress.
There are signs to look for after your first few days and throughout the season.
Too little water: droopy leaves, fail to germinate
Dehydration shows in colour changes, a slight droop and then a true wilt.
If the weather is unusually hot or windy, add a few minutes or split watering times. Drop it down again after the weather conditions resume to normal.
Some wilt does happen during the day and the plants should perk up overnight.
If you have heavy clay soil, the same colour changes and wilt also could mean there’s too much moisture. Water displaces air so if there’s too much water, the roots will start to rot. This makes the plant unable to take up moisture and it starts to wilt.
In order to tell the difference, stick your fingers deep into the soil around the emitters.
Deep Drink
Its nice to give your plants (and soil) a deep drink of water every couple of weeks, or once a week during the hot season. This helps keep the microbiology of your healthy, living soil alive and well, and not just the space around your plants produced by emitters. Microbes become dormant or slow in super dry ground so don’t let that fertile earth you built up with compost go away!
If you use a water wand, turn the pressure down so it’s applied slower for a thorough soaking.
Watering this way every week during the heat of summer will help keep your soil flourishing. Do it early morning or late evening so you can water the plants as well. This reduces dust and acts as a pest control for aphids, spider mites and flies.
Early morning watering in spring and fall allows for the plants to dry off before the cooler nights come. Early/late evening watering during the hotter summer allows the plants time to absorb the moisture and recover from the heat.
All in all, of a watering schedule is difficult for you, no matter which irrigation system you choose, what when it works for you. Each day can look different.
Obviously in a perfect world you’d have a set schedule that worked best for you and your plants but if its between watering in the heat of the day or not watering at all, water!
And have I mentioned get a timer so your watering system is on autopilot? Your job is to spend time with your plants, checking for signs on how your new irrigation system is working out!
PIN IT FOR LATER


You May Also Like
Crops for a Fall + Winter Harvest
9 Steps to Choosing The Best Vegetable Garden Location